How to create an interactive sliding image gallery.
Adding interactivity to your page is easily done by using Acrobat Pro. Follow these simple steps to create your own interactive sliding image gallery.
First thing to do is size up your selected image’s using photoshop, so they fit the area you want to place your gallery. Make sure all image’s are flattened and saved as PNG format using RGB colour process. Once done place all image’s in a folder on your desktop ready for selecting.
Load Apazine Dashboard and select number 8 – “MANAGE WIDGETS” and then press “ADD LINK” button.
Select the radio button called “IMAGE” and press the green plus sign to add as many images as you wish.
Upload the images by pressing the “UPLOAD IMAGE” button and then select the individual ‘
image’s you have chosen for your gallery.
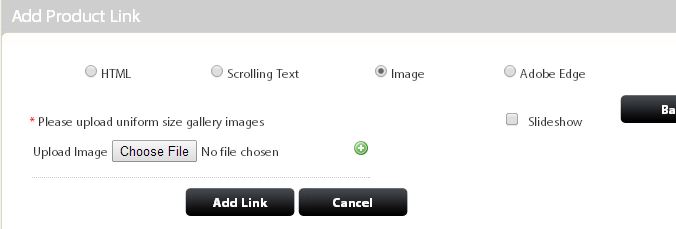
You will there is a tick box for SlideShow, if you tick this then the images will rotate automatically on a timer, if this if left unticked then the user will have to ‘swipe’ the images to view them all.
Once you have added all the images for the slideshow simply click the “ADD LINK” button to move on to the next stage.
Copy the top link marked html://imagegallery. (you will need this later)

Go back to your page in Acrobat Pro and select the “LINK” button
The Link button can be found under ‘TOOLS’ > ‘CONTENT’ >

Once you click on the button, draw a box around the area you wish to place your image gallery.
Then click on the “OPEN A WEB PAGE” radio button as below and click “NEXT”
(Note: open a web page is selected for all interactivity including email and video.)

Now paste the code in where indicated “ENTER A URL FOR THIS LINK” make sure there are no spaces after the numbers. Then press “OK”
Remember to save your PDF document.